10 Ways to Make Your Flower Beds Look Finished and Fresh
Frame & Finish: Why Garden Borders Matter
A clean garden border does more than keep mulch in place—it acts like the picture frame for your planting, giving structure, visual polish and intentionality. Whether you’re edging with crisp steel, warm brick, or soft plantings, a good border makes your beds feel finished, inviting and a little bit styled. In the paragraphs that follow, we’ll explore a range of border-edging types, materials and moods to suit every garden.
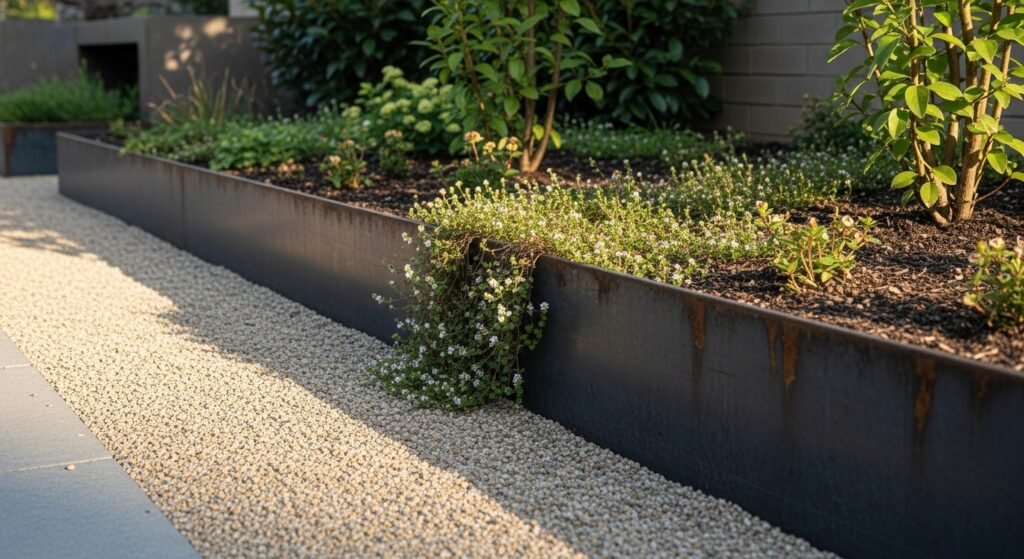
1) Matte Black Steel Edging
Using a low-profile matte black steel strip is a quietly bold move. It creates a sleek, crisp line that separates path or lawn from planting with minimal fuss. In smaller yards or urban gardens, this kind of edging keeps the look tidy and modern without overpowering. To style it, consider fine gravel on the path side, low-growing spillers on the bed side (like creeping thyme or sedum), and a few terracotta pots or warm lights to soften the hardness of the steel. Over time, small scuffs or a little patina only add character—not something to hide.
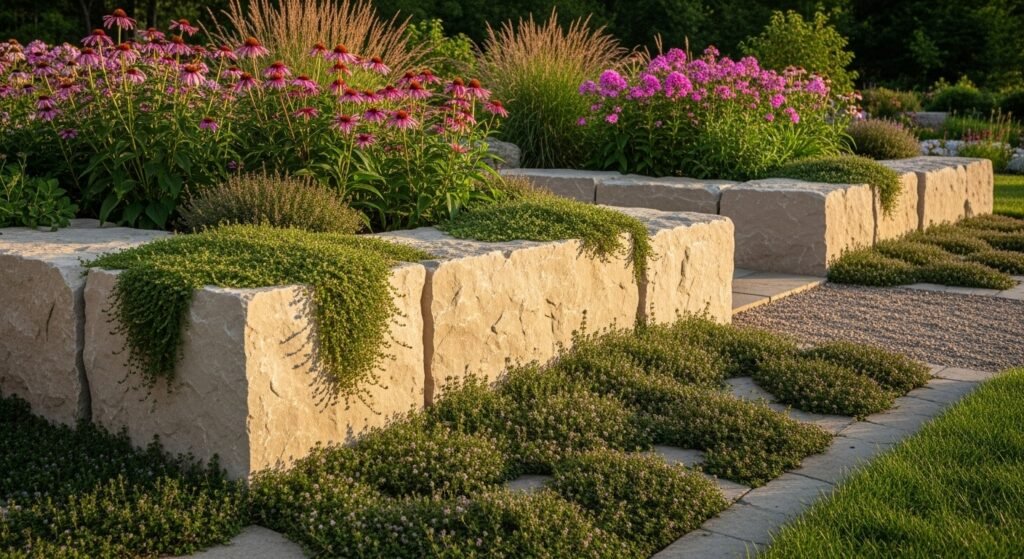
2) Creamy Beige Textured Concrete

If you prefer something with softness and warmth, a creamy-beige textured concrete border hits the sweet spot. The gentle curve lends movement; the subtle texture keeps it approachable. It frames your planting bed without demanding attention, letting perennials spill modestly and the foliage play. This is perfect for cottage-style borders or suburban plots where you want structure but not formality. Plant low groundcover in the joints (like thyme) and behind it herbaceous perennials for depth. A fresh layer of dark mulch helps the warm border pop.
3) Weathered Charcoal Steel
Switching up to a weathered dark steel gives you ultra-clean lines with a lived-in feel. The dark finish recedes visually, letting your plants do the starring role, and the minimal profile works well in contemporary or relaxed gardens. The slightly rugged patina keeps things from looking too clinical. For planting, choose low groundcover to soften the base and allow plants to just lightly spill over. On the path or lawn side, a pale gravel adds contrast. Maintain by sweeping leaves occasionally, and you’ll keep that clean line crisp.
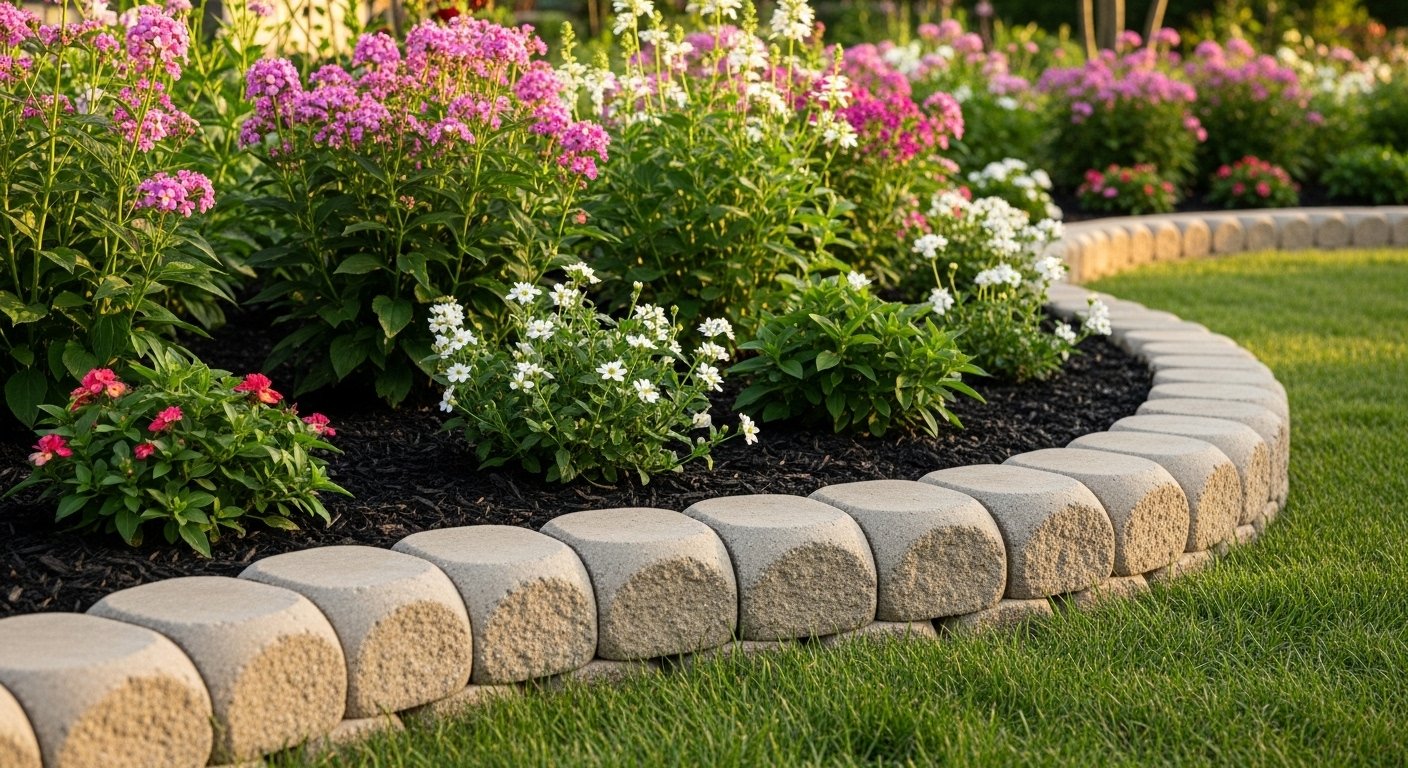
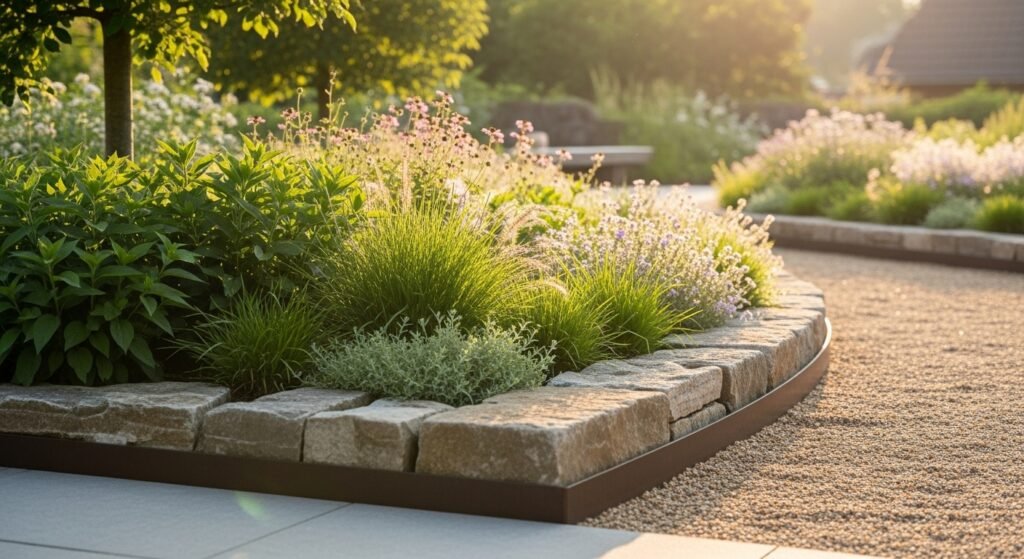
4) Rustic Gray Stone
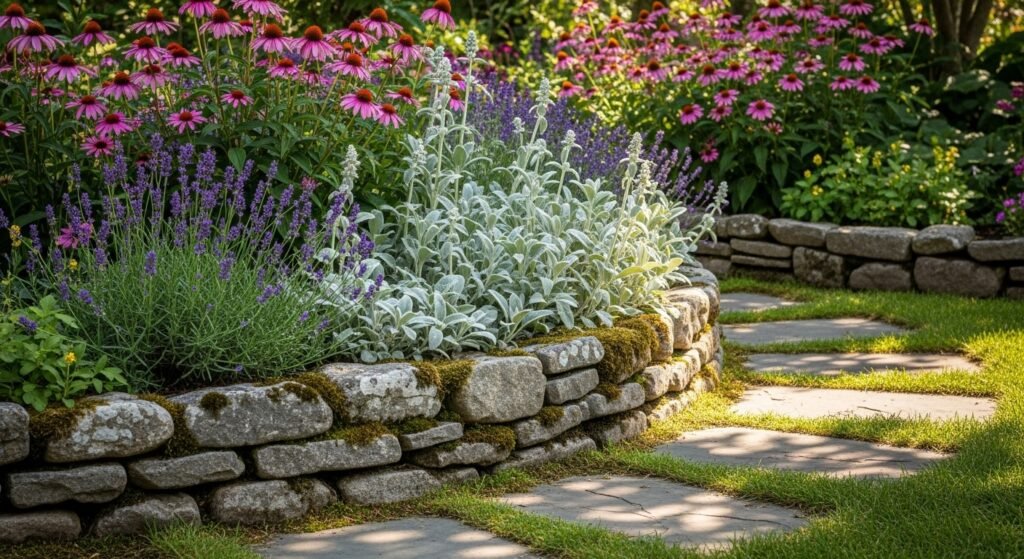
There’s something timeless about rough-cut grey stone edging. It brings texture, character and a hand-worked feel to the garden. The irregular tops and cracked surfaces give the bed a belonging-in-the-landscape vibe. Ideal for cottage plots or perennial mixes where you want elegance without precision. Let plants spill gently over the stone—think lamb’s ear, sedum, low grasses—and include a gravel path or stepping stones for extra charm. The look leans relaxed; if you need mower-friendly perfection this may be less ideal.
5) Brushed Stainless Steel
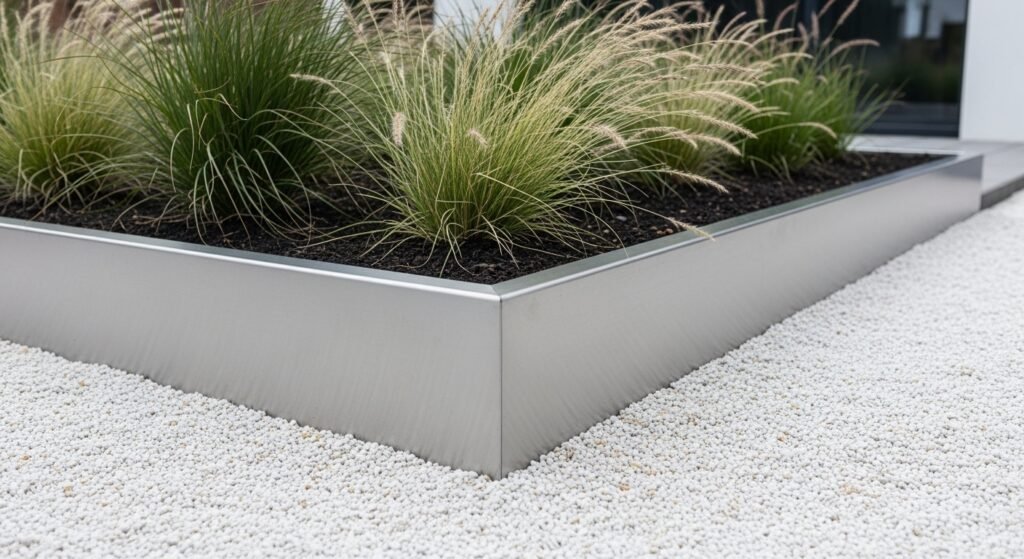
For gardens where modern meets low maintenance, brushed stainless steel edging is hard to beat. The slim reflective line looks intentional and refined—perfect for drought-tolerant zones, coastal plots or minimalist landscapes. Pair it with architectural plants like lavender or grasses, and contrast the smooth metal with warm elements (wood benches, terracotta pots) so it doesn’t feel too cold. Because the finish is neat, maintenance is minimal—just keep gravel sized uniformly and plants low enough so the line remains visible.
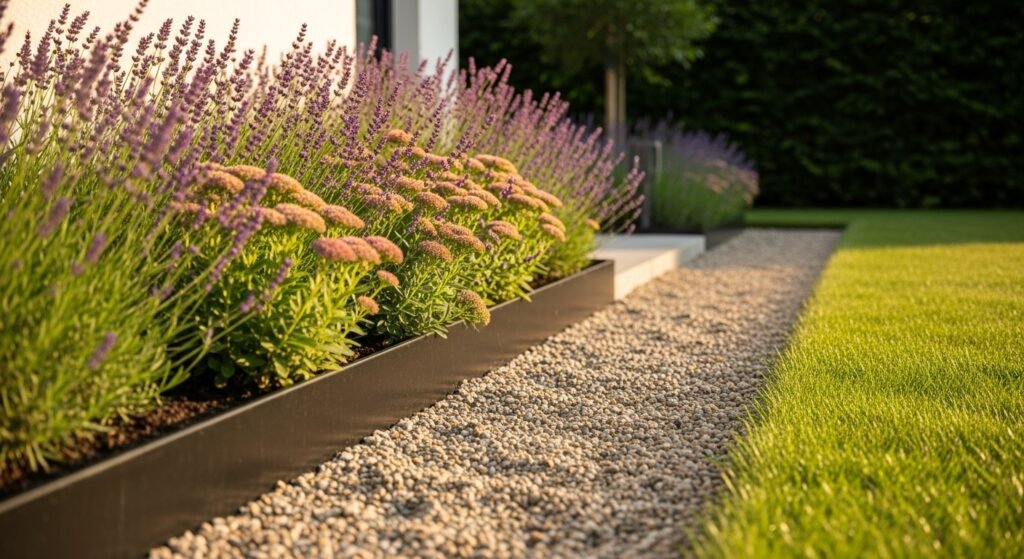
6) Weathered Brown Wood Sleeper Edging
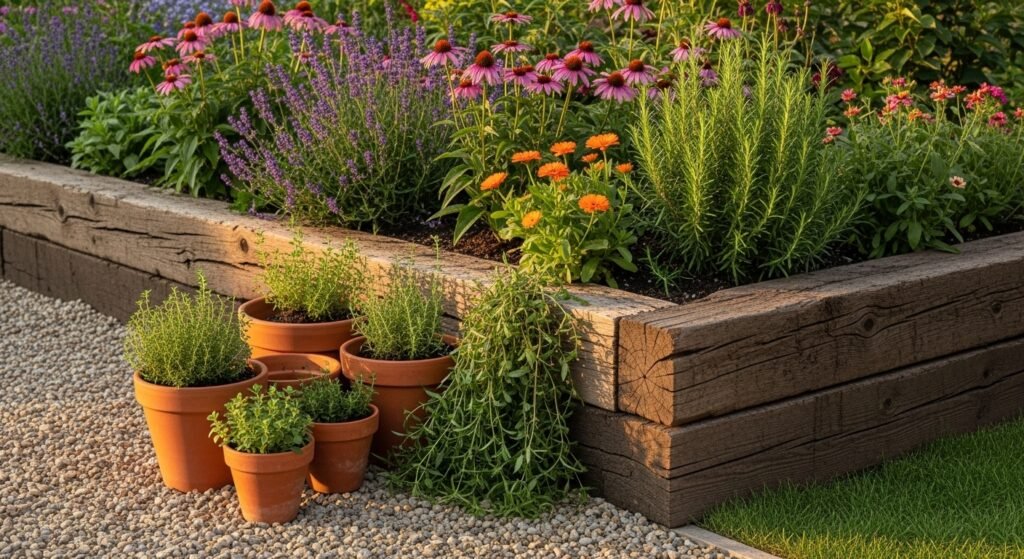
If you’d rather go natural and informal, a chunky timber-sleeper edge gives cozy, lived-in charm. The weathered wood patina feels comfortable and ground-level, especially with cottage perennials and trailing groundcover. It’s not ultra-formal, and in moist spots you may need to monitor decay, but the vibe is effortless. Let foliage spill gently, add terracotta pots and a bench for personality, and embrace the natural texture rather than hiding it.
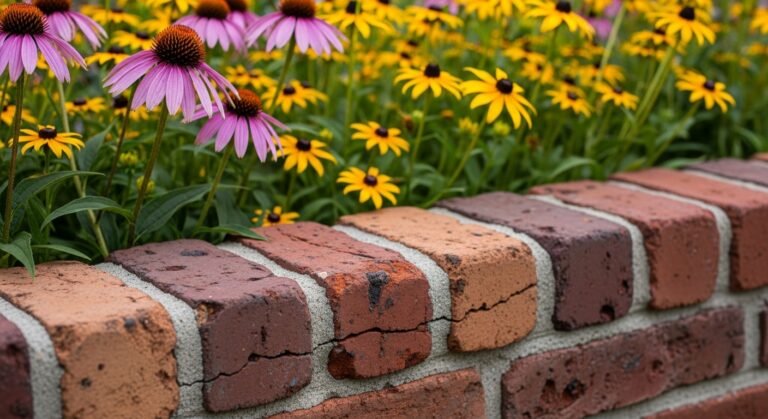
7) Terracotta Brick Border
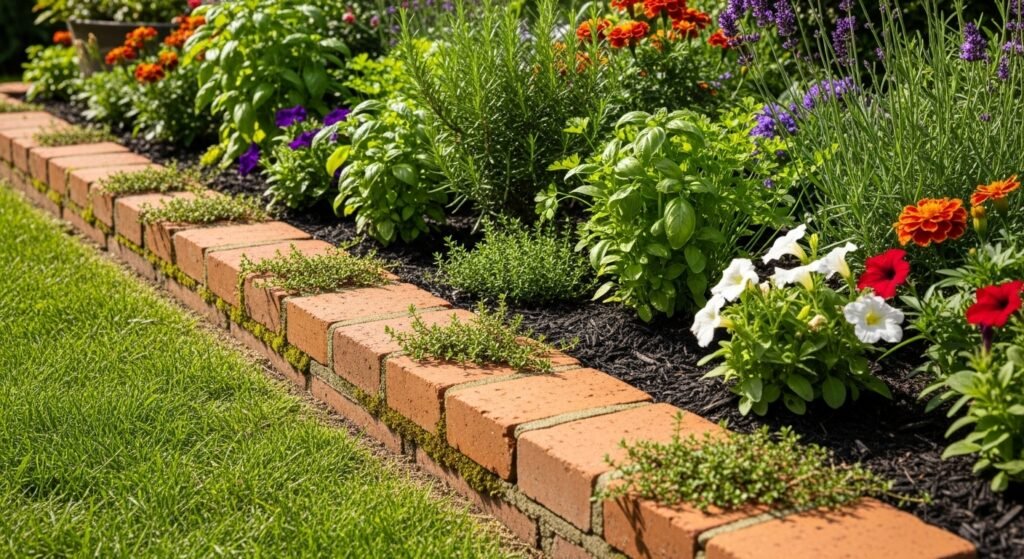
Terracotta bricks bring warmth, history and a sense of welcome to the garden. A low row of sun-warmed bricks gives the bed a neat edge without appearing precious. It’s ideal for family yards, herb patches or welcoming front garden beds. For styling: tuck creeping thyme between joints, use dark mulch to make the bricks stand out, and place a few weathered pots nearby. Keep the grass trimmed tight and reset any shifted bricks to maintain the effect.
8) Charcoal Wood (Weathered)
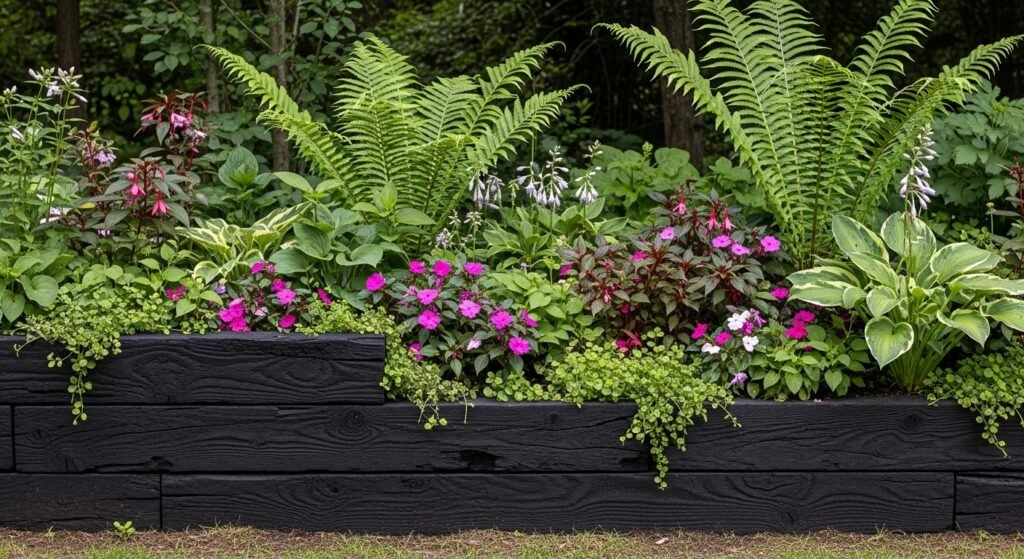
Using weathered dark wood—for example old sleepers or boards—creates an under-the-radar border that blends rootsy charm with functionality. The soft dark tones let the plants shine, and the irregular height contributes to an organic, relaxed feel. This is perfect for native plantings, woodland edges or shady zones where you want part of the garden to feel “grown in.” Style with ambient lighting, rustic benches, and low perennials that spill just enough to soften the join.
9) Large Rough-Hewn Beige Stone
When you have a larger garden or feature bed and you want the border to feel like a stage, use large rough-hewn beige stones. The warm tones and chunky shape mean the edge has presence, but because it sits low and the shapes are natural, it doesn’t shout. It frames perennials, bulbs or garden theatre nicely. Let creeping groundcovers run over the stones, add taller foliage for depth, and include a few earthen pots for echoing tones. It’s more rustic and less about perfect precision.
10) Corrugated Metal (Rusty / Galvanized)

For a style with personality and edge, corrugated metal edging—especially if you allow it to weather—brings character. The rust tones, ridged texture and low profile create a playful yet intentional border, great for edible gardens, wildflower edges, or casual back-yards. Style it by mixing in rustic pots, letting perennials spill over, and considering a gravel path alongside. Because it may shift over time, plan for a little maintenance (anchoring, straightening) but embrace the patina—it becomes part of the story.
Tips & Tricks for Success
- Pick the material that suits both mood and maintenance: Brick or stone last long; steel is crisp but may weather; wood is warm but may rot. Test a piece in place if you’re unsure.
- Mind the height and mower-compatibility: For beds you mow up to, a 2–4″ low edge works. Raising the edge suits gravel paths or veggie beds.
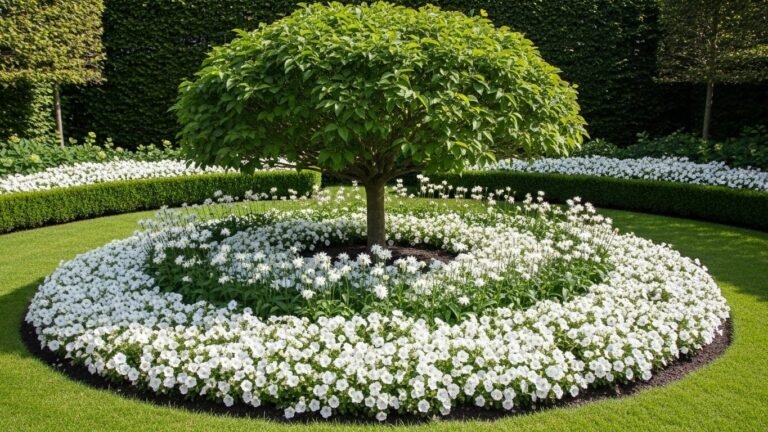
- Curves = visual interest: Avoid straight lines unless your space demands it. Gentle curves slow the eye and make the bed feel larger. Use a hose or string to map your curve before digging.
- Install with a buried lip: Dig a narrow trench so one side of the edging sits slightly below grade—this helps keep grass from creeping in and mulch from escaping.
- Use contrast to pop the border: For instance, pale stone against dark mulch, rust metal beside green plants, black edging next to gravel. Contrasts help define the bed.
- Plan for access and maintenance: Leave removable sections or breaks where you’ll wheelbarrow, prune or move plants. A narrow mowing strip beside the lawn helps keep things tidy.
- Soften with plants and lighting: Hard edges benefit from low groundcovers that spill over, and subtle lighting (e.g., solar lights) to keep the edge visible at dusk.